2: visuals
See What’s Possible Before You Commit.

This is where we turn rough ideas into clear directions. We’ll document what exists today, sketch concepts, compare options, and refine your choice, so you move forward with confidence, not guesswork.
2a: Current

Understand where you’re starting from.
Before we draw new ideas, we take stock of what’s already there.
-
Measure & Document : existing floor plans, dimensions, and photos.
Site Review: zoning overlays, setbacks, and property-specific factors.
Condition Check: structure, utilities, and any red flags.
Baseline for Design: the canvas that future ideas are built on.
-
Every good design starts with an honest look at the existing space. Missing a beam, underestimating ceiling height, or overlooking utility runs can cause costly surprises later.
Here we build the foundation for visuals by making sure what we design actually fits reality.
↓ Next Step ↓
2b: City Guidelines

Know what the city will (and won’t) allow.
Before you fall in love with a layout, let’s make sure it’s actually permitted. We check the zoning, setbacks, height limits, and other code rules that apply to your property.
-
City Guidelines : setbacks, lot coverage, height, and floor area
Spot hidden limits early: like easements, slope rules, or septic restrictions
Understand your build potential: how much you can add, shift, or change
-
City rules don’t always match what your house feels like it can do. We’ve seen perfect designs get thrown out because they ignored a setback line or missed a height limit. This step brings clarity early, so you’re designing within the rules from the start, not scrambling later.
Choose Your Path:
↓ Next Step ↓
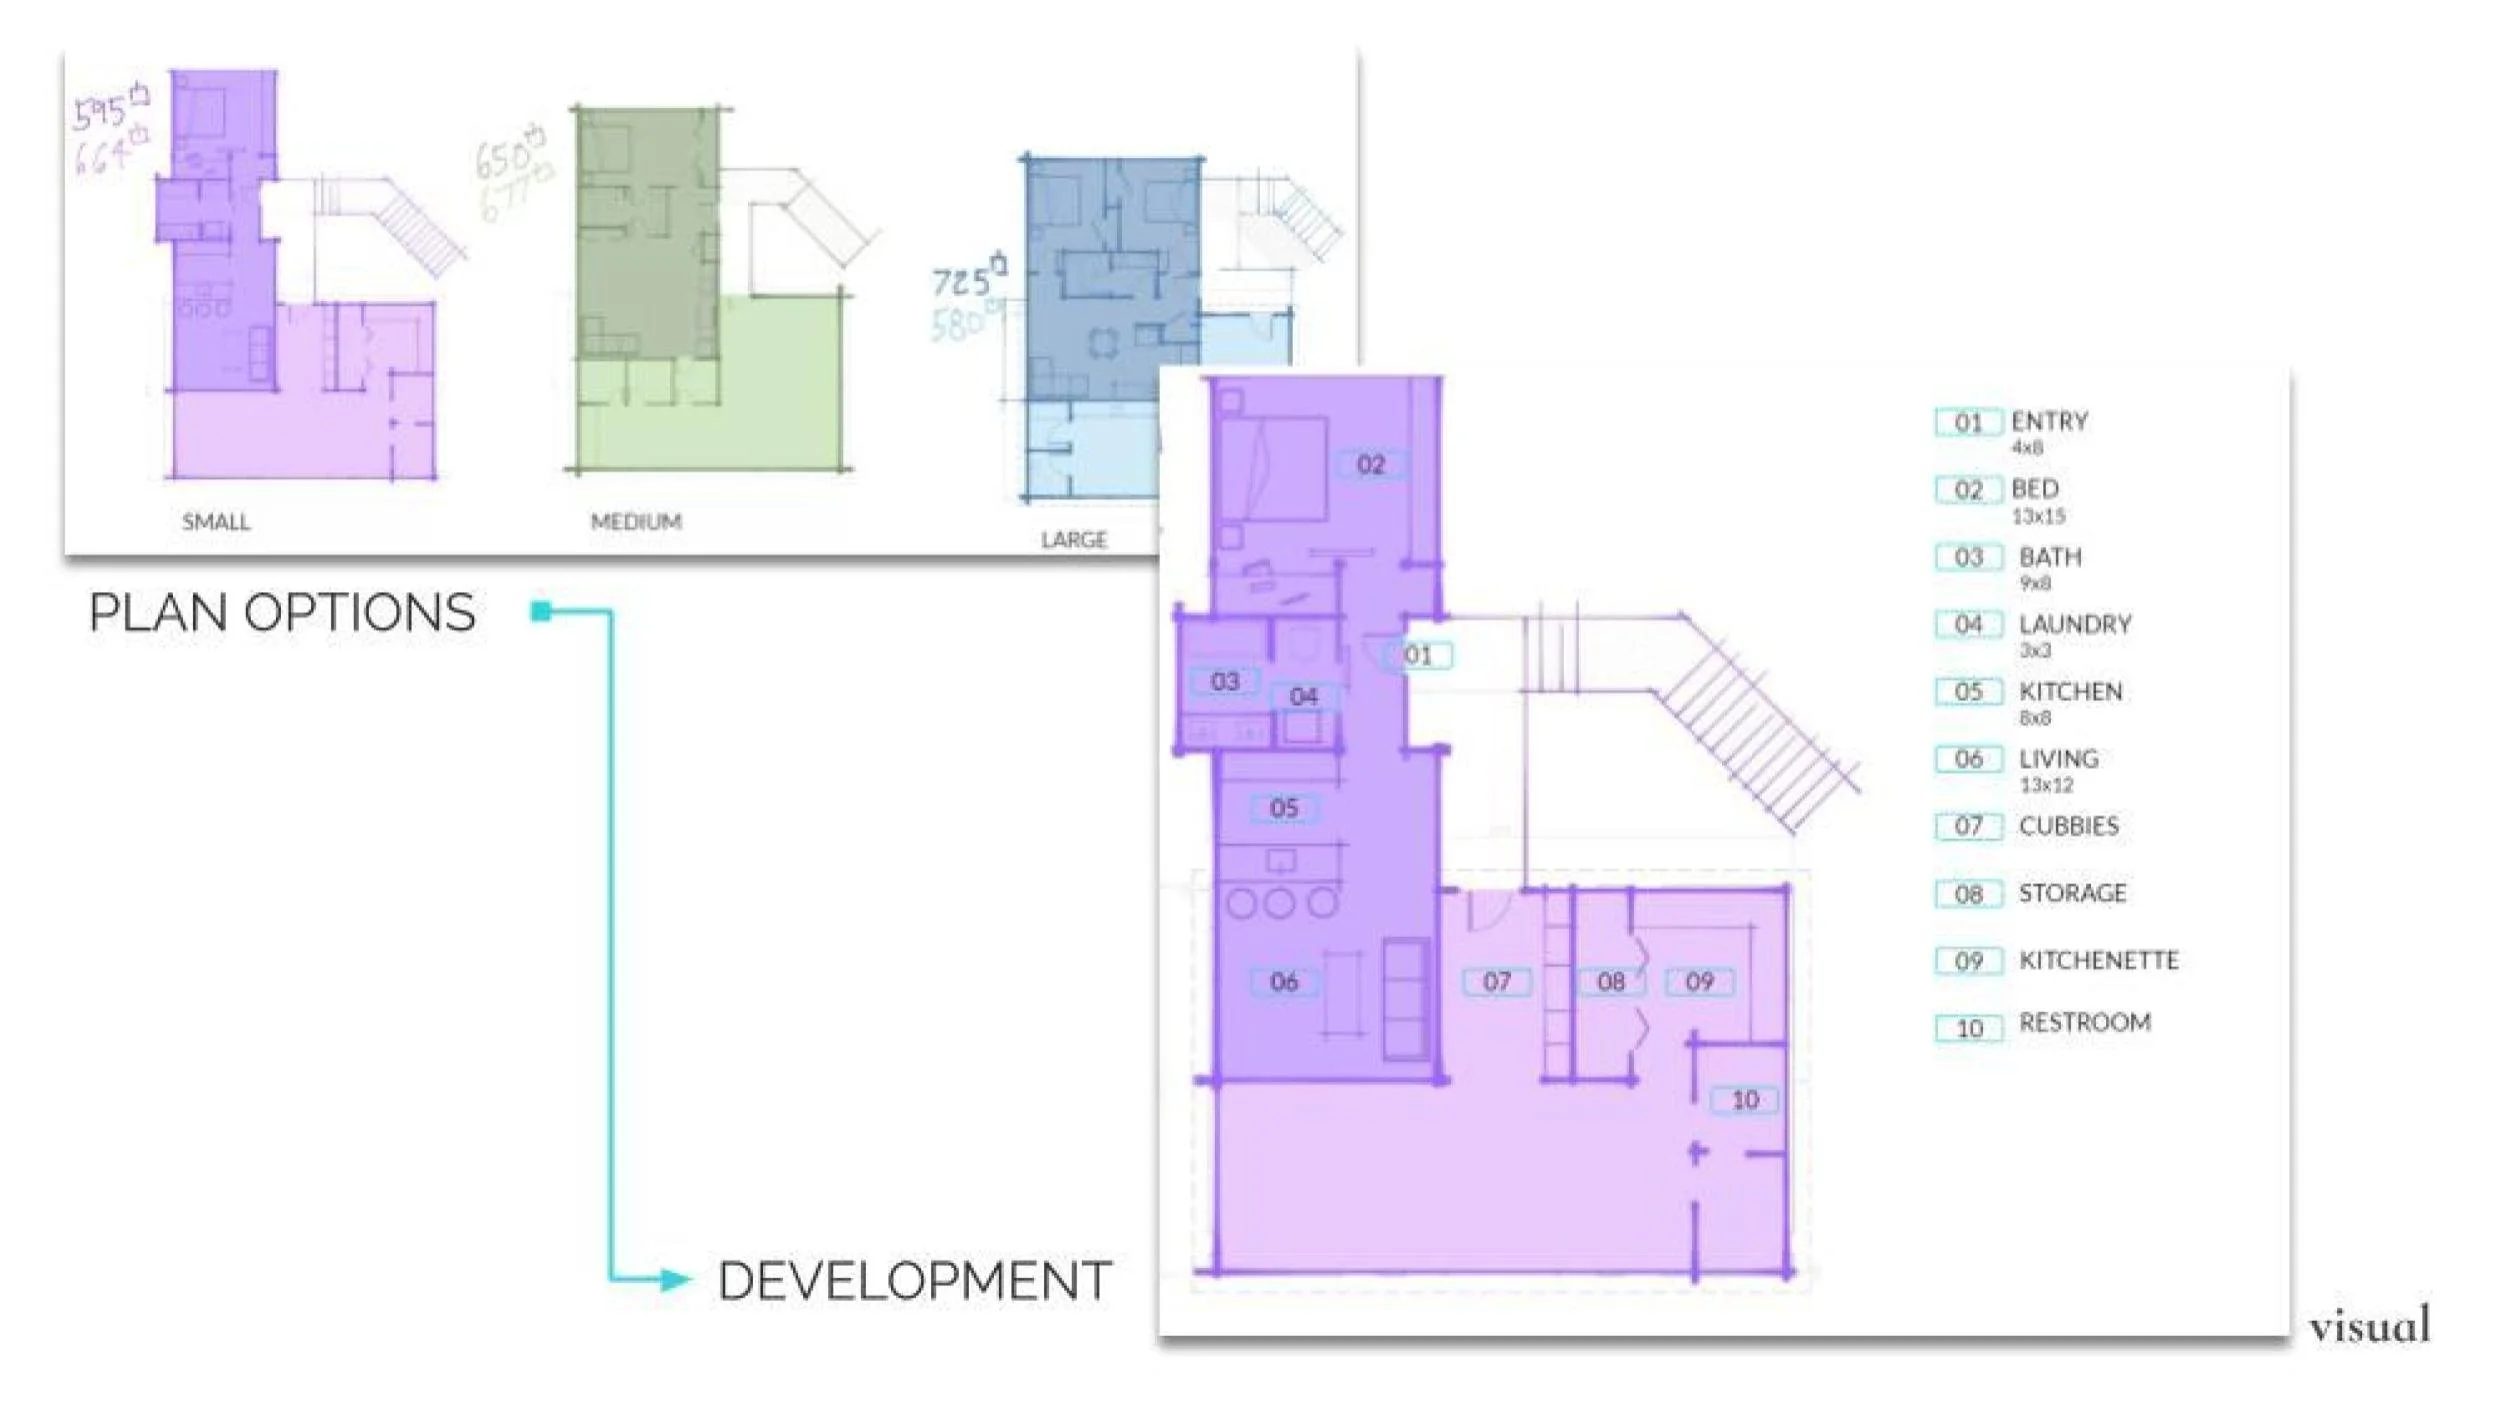
2c: visuals

Turn what you have into what could be.
With your current conditions documented, we can start exploring new layouts and design directions. This is where sketches, floor plans, and layout options turn inspiration into something real. We explore your space in a way that’s visual, collaborative, and completely tailored to you.
-
Concept sketches — quick drawings that test different possibilities.
Side-by-side options — compare layouts without locking into one idea too early.
Feedback loop — refine based on your priorities and how you’ll actually live in the space.
-
This is the creative part — but also where homeowners can get overwhelmed. By seeing clear, simple concepts (not overworked designs), you can react, compare, and choose a direction without wasting time or money.
Choose Your Path:
↓ Next Step ↓
2d: Budget & Builder Pathways

Know the cost. Choose your path.
With your visuals in hand, we’ll help you align your design to a real-world budget and introduce clear paths to engage a builder—whether you’ve got one already or not.
-
City Guidelines : setbacks, lot coverage, height, and floor area
Spot hidden limits early: like easements, slope rules, or septic restrictions
Understand your build potential: how much you can add, shift, or change
-
City rules don’t always match what your house feels like it can do. We’ve seen perfect designs get thrown out because they ignored a setback line or missed a height limit. This step brings clarity early, so you’re designing within the rules from the start, not scrambling later.
Choose Your Path:
Why It Works
Projects break down when decisions are rushed or left vague. Our process slows things down just enough to get the big calls right — then speeds up when it matters most. By breaking the journey into clear stages, you:
Avoid wasted time and money
Keep decisions documented and organized
Protect your design intent all the way through construction
Home, visualized
-
![Concept Design]()
Exploring Design
-
![Space Planning]()
The Flow of Your Home
-
![Design Journal]()
Design Journal
-
![Home Sketches]()
How It's Going to Look.